So you’ve been fluffing around on Pinterest for a while now with recipes and inspiring quotes, but still have no idea how to use Pinterest for handmade businesses.
Or maybe you’re just getting started with Instagram, and the thought of learning another social media platform makes you want to stab a Pinterest Pin Cushion.
You’re not alone.
Here’s how to get started with Pinterest for handmade businesses to sell your products… without getting distracted by 6,390 photos of pugs.
Keep your eyes on the prize
When you remind yourself of the end goal – to make a sale – the primary strategy for getting sales from Pinterest becomes clearer…
Create beautiful, entertaining, inspiring and helpful content for your target audience that links to your online shop.
Of course, not every person who clicks your Pins is ready to buy NOW, but once they click through to your website, online shop, directory listing or blog, you’ve instantly boosted your brand awareness. So if they don’t buy now, they may become the 87% of users who buy a product because of something they’ve seen on Pinterest.
What about re-Pinning?
Saving other people’s Pins (or re-Pinning) is also good for brand awareness, as it notifies the original Pin owner, who’s then likely to view your account. Depending on when your followers are online, re-Pins can also appear in their Home Feeds.
The exact formula for re-Pinning effectively to appease the Pinterest algorithm, however, is largely unknown, presumably so Pinterest can banish organic reach altogether one day and make us pay for ads. *Coughs*, Facebook.
While the sweet spot for posting original Pins vs re-Pinning is an elusive equation, Brisbane blogger Rebekah Allan was able to increase her website traffic from 1,000 views per month to 5,000 views per month in just six weeks by using a simple strategy…
Spend 10 minutes Pinning 30 pins every day, doing 50% your own and 50% others.
Before you freak out, wondering how you’re going to come up with 15 original pins every day, adjust this formula to where you’re at in business right now. Something is better than nothing and consistency is key, so choose a formula that works for you, and test your progress over the course of 2-3 months.

The Organic Truth
Regardless of when Pinterest inevitably forces businesses into paid advertising to get their Pins seen, there’s a couple of things every social media platform rewards without pay: quality content (original Pins), social behaviour (re-Pinning & commenting) and basic optimisation (keywords & hashtags).
So let’s get you setup to ensure you’re investing your time on Pinterest wisely by perfecting your profile and Pinning optimised content to relevant Boards that will ultimately help you sell more stuff.
First, get a Pinterest BUSINESS account
A business account gives you access to Pinterest Analytics, including Audience Insights, which provide an in-depth look at who’s interacting with your Pins and what else they’re interested in.
This info can be used to guide your future content, like popular topics for your DIY tutorials, as well as influence your product development.
Let’s say you make handmade macramé wall hangings and discover that 92% of people who engage with your pins are 2 x more interested in “gardening” than the average Pinterest user.
Handmade macramé pot plant hangers might therefore be a logical next addition to your collection, given the majority of your audience is keen on gardening.

So… Sign Up (or Convert) to a Pinterest Business Account
If you have a Personal Account, it’s easy (and free) to convert to a Business Account without losing any of your Boards or Pins. Or if you’re new to Pinterest, simply sign up for a Business Account.
To get access to your Analytics, you need to claim your website. It’s a bit techy, but worth stepping through the instructions to access the benefits. You can also claim your Instagram, Etsy and YouTube accounts to let people know where they can see more from you.
Optimise Your Pinterest Username & Business Name
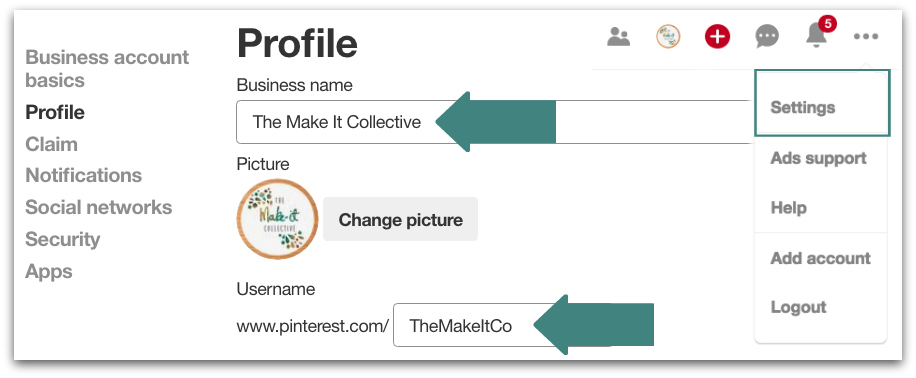
Choosing a Username
Your username is what you’ll add to your business card and printed materials that tells people what to search to find you on Pinterest. This becomes part of your Pinterest URL. For example, “TheMakeItCo”…
www.pinterest.com.au/TheMakeItCo
Pinterest Usernames must be unique, so if your business name is taken, choose a Username as close to your business name as possible.
In our case, “TheMakeItCollective” was taken, so we chose “TheMakeItCo“.
Using abbreviations, acronyms, the year your business was founded, or “AU” to indicate you’re an Australia handmade business are good workarounds for creating a unique variation.
Aim to keep all your social media Usernames as similar as possible (ideally identical) to make it easy for followers to find you across other platforms, like Facebook, Twitter and Instagram.
If you want to change your existing Username, this can be easily done in the Settings.
Choosing a Business Name
Unlike your Username, your Pinterest Business Name does not need to be unique, so this should be an exact match for your business trading name, even if there are others with the same name.
Optimise Your Pinterest Bio
You’ve got 160 characters to communicate your products and personality, while highlighting any uniqueness that makes your brand the obvious choice over competitors. You also want to cram in a couple of keywords that people are likely to search when looking for products like yours.
Let’s look at The Make It Collective Pinterest Bio…
The Make It Collective is a vibrant community (WHAT) of Australian creatives (WHO) and lovers of handmade (KEYWORD). Retail, gallery and workshops (WHAT) at 264 High St Northcote, Victoria (WHERE).
Don’t be brief and mysterious – people are curious and need to know as much as possible to decide whether you’re worth a follow.
Are you a handmade Melbourne business? Tell people. They may be more inclined to follow if they know you’re local. Are you frequently asked about custom orders or delivery countries? Include it in your bio to instantly appeal to your typical buyer.
Decide which info is most important to your audience and prioritise this in your bio.
Add a Profile Pic
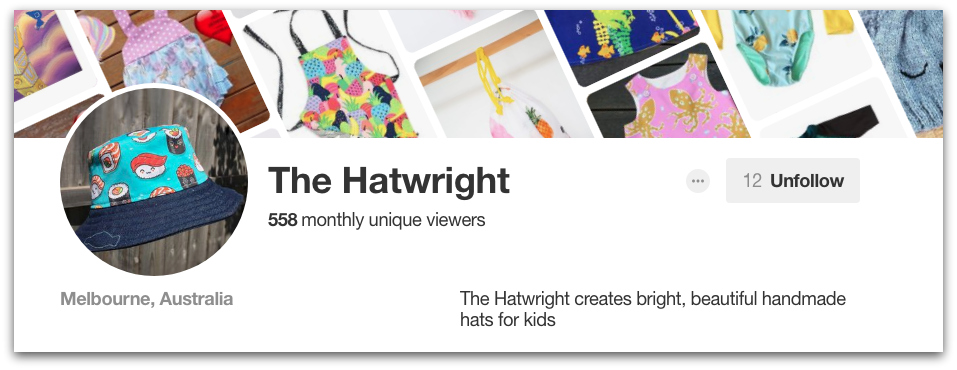
If you’ve got a logo, this becomes your profile image. If not, start with a high-quality close-up image of your best-selling product, like Melbourne’s handmade children’s hats, The Hatwright.
Remember, progress is better than perfection, so don’t worry if you don’t have a logo yet – get on Pinterest and start building your audience now, then upload a logo later.
How to Decide on Pinterest Boards
Your Very First Board…
Deciding on the setup of your Pinterest Boards can be tricky, but with trial and error your Board structure will eventually fall into place. The good news is, Boards can always be renamed and reordered, descriptions rewritten and Pins easily moved to other Boards if you decide on a more logical structure down the track.
One approach, suggested by social media guru Louise Myers, is to setup one main board with your over-arching topic and use this as a starting point for all your Pins (like a feeder Board), then re-Pin to your other Boards from this primary Board.
If you make a variety of handmade clothing, you could include all your items on your primary Board and call it “[Your Brand Name]’s Handmade Clothing”, then create additional Boards for subcategories, like…
… And begin populating these boards with a mix of your Pins and re-Pins.

Whether you decide to feature other Makers on your Boards is entirely up to you. While it does promote competing brands, it also positions your Pinterest account as an authority on your product category, which will encourage people to follow your account.
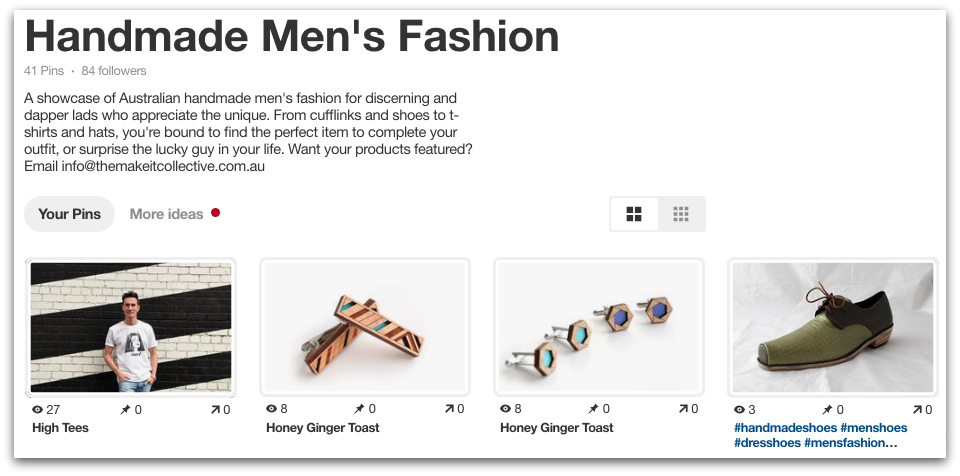
If you’re not keen on re-Pinning similar handmade items, Pin non-competing, complementary products. If your product is handmade men’s shirts, create a Board that focuses generally on Handmade Men’s Fashion, allowing you to re-Pin products like men’s shoes, hats, cuff links and other items that fall within this category, but don’t directly compete with your products.
Considerations When Creating Boards
There’s no right or wrong way to setup your Pinterest Boards, however here’s a few of things to consider before committing…
- If you’re planning on Pinning only your products, how many Pins can you add to the board, both now and in the future? If you make handmade sunglasses cases, do you have enough to make an entire Board, or is it better to add these to a more general Board, like “Handmade Women’s Accessories”? If your product range is limited, it might be best to start with general Boards, so you’ve got at least six Pins on each to fill the Board previews, without leaving blanks.

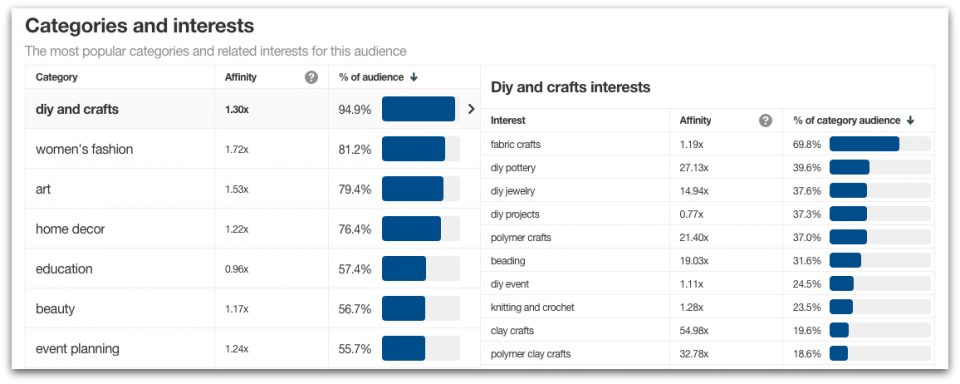
- Is the Board relevant to your audience? YOU might be interested in vintage cars, but are your customers? If not, make the Board secret so you can Pin about your personal passions, without diluting your brand. This is where your Pinterest Analytics can guide you on which Boards are likely to resonate most with your followers. If we look at The Make It Collective’s Audience Insights, we can see that 94.9% of our audience is 1.3x more interested in “diy and crafts” than the rest of the Pinterest audience, so creating Boards that relate to “fabric crafts“, “diy pottery” and “diy jewellery” is likely to resonate well with our audience.
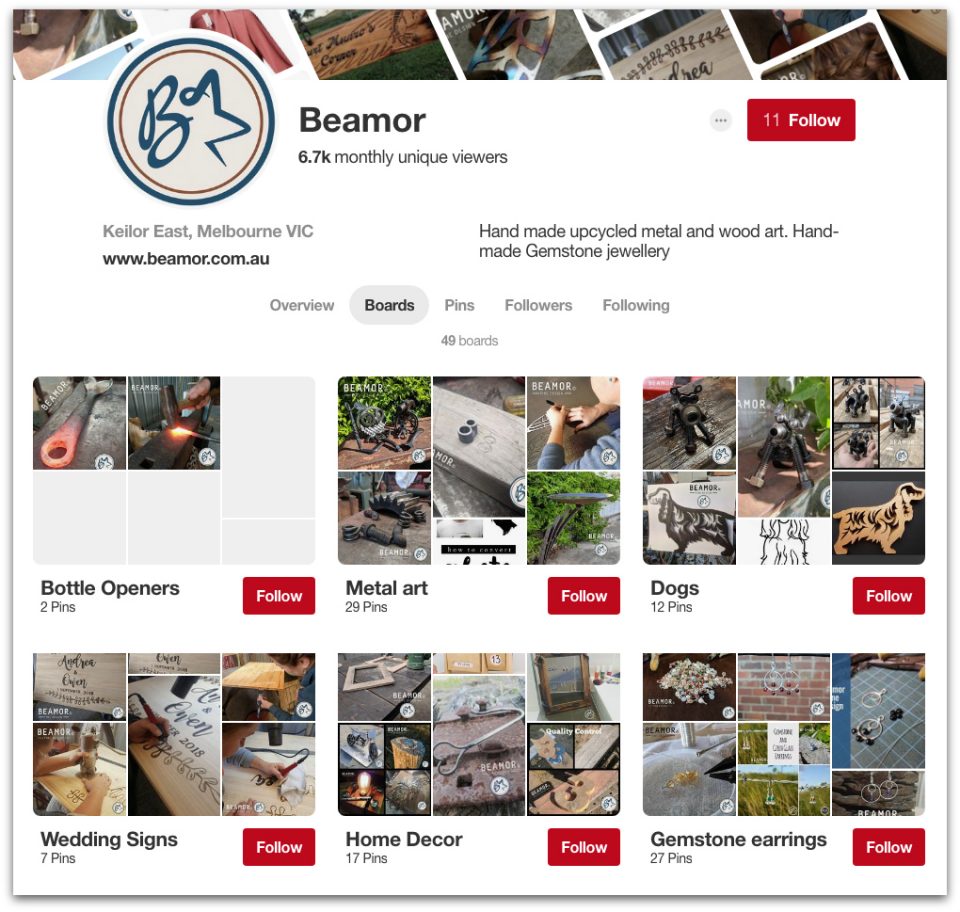
- What are other brands in your niche doing? Check out other Makers’ Pinterest accounts to see how they have arranged their Boards. Does it feel logical and consistent with their brand and products? What do you like/dislike about the way it’s setup?
Pinterest Board Sections
In 2018, Pinterest launched a feature called “Sections” to help users organise Pins into different categories within a Board. While this feature was largely designed for non-business Pinners, we’ve found Sections to be useful for organising individual businesses from The Make It Collective Directory on our Board, The Handmade Directory. Click the Board below to view this setup in action (it’s a work in progress).
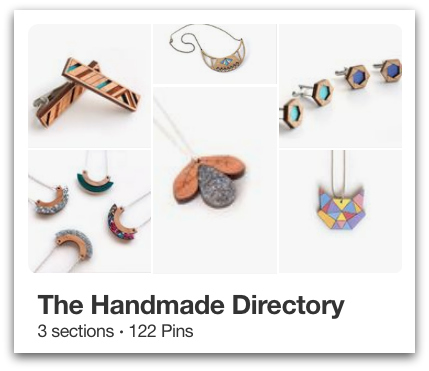
So now when a Maker joins the Directory, we create a new Pinterest Section just for them, making it easy for Pinterest users to browse handmade businesses at a glance within our Handmade Directory Board.
There may be instances where Sections make more sense than individual Boards for your business, so keep this in mind when creating your Boards.
Optimising Your Boards
Board Names
Pinterest is one big giant search engine. Think about which words and phrases people would search when looking for the Pins featured in your Boards. With this in mind, here’s what NOT to name your Boards…
- Artsy Inspo
- Nice Things
- Cool Ideas to Try
- Om Nom Nom Yum!
- Interesting Stuff I’ve Found
The key is to be specific, using words and phrases that people would actually search when looking to find your content and products.
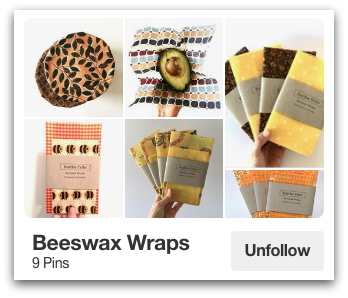
There’s no confusing what might be on Earths Tribe’s Beeswax Wraps Board. Simple, but effective in terms of SEO
Board Descriptions
Likewise, your 500-character Board Descriptions should include keywords and, if featuring your products only, relevant details about…
- Custom orders
- Delivery times & prices
- Product ingredients
- Unique processes or materials used
- Where the products are made
- Typical gift recipients for your products
- Typical uses for your product that solve buyers’ problems
Handmade customers are typically environmentally aware consumers, so they’re often conscious of how far their goods have travelled in order to reach them. If they know a product is locally made, they may be more inclined to buy, so include this in your Board Descriptions.
Board Descriptions should also have a call to action for more info, or invite visitors to take ‘the next step’.
Board Categories
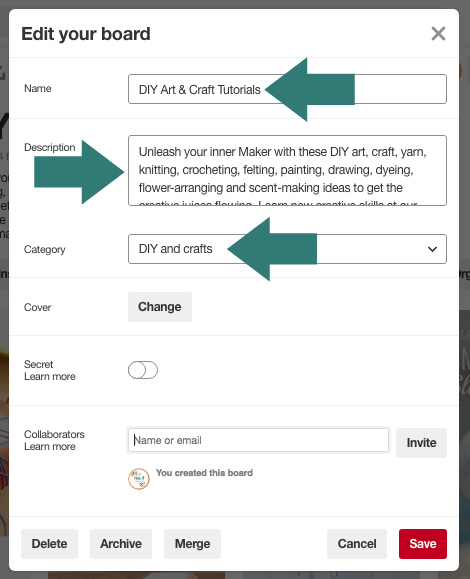
When creating a new Board, assign a Category. This way your Board is more likely to appear when users search by Category.
Optimising Your Pins
Now you’ve got some Boards, let’s get Pinning!
Pretty Pics, Please
The most important part of Pinning your own products is sharing eye-catching, beautiful images that inspire re-Pins. If your pics are lacklustre, invest time updating them.
The Make It Collective run regular Makers Meetups where creatives have access to a photography light box for creating professional-looking photographs for Pinterest, so sign up to our Makers Newsletter to be notified of the next event.
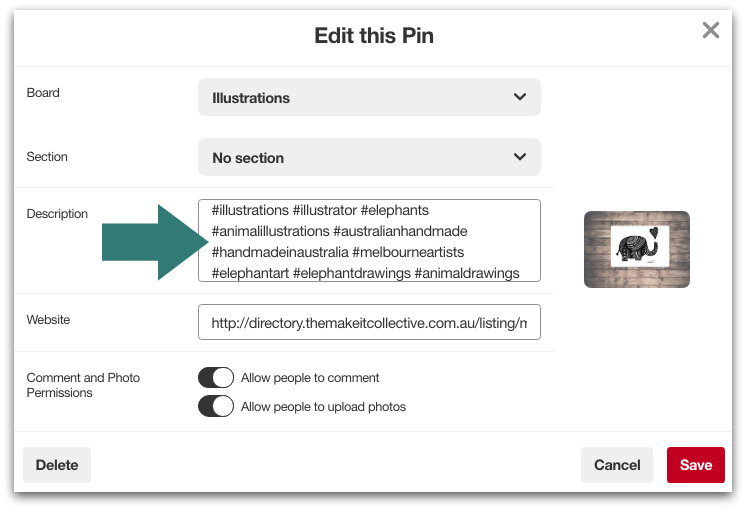
Add Hashtags
Like Instagram, Pinterest uses hashtags to help users find Pins about specific topics when searching for things like “#handmadegiftcards”. Hashtags also help users discover related Pins by clicking on hashtags in Pin Descriptions, which takes them to a feed of all the Pins that share that hashtag, featuring the freshest Pins first.
Pinterest recommends adding no more than 20 hashtags per Pin, keeping them objective and relevant. If you’ve already Pinned pics without hashtags, don’t bother adding them now; the hashtag feed is ordered by freshness, so updating old pins won’t boost their chances of getting discovered.
Install the Pinterest Browser Button
This Pinterest Browser Button makes it easy for you to Pin products directly from websites (including your own) without having to save them to desktop first. After installing, simply click the red P at the top of your browser whenever you find something you want to Pin, then follow the instructions to instantly upload the image to your desired Pinterest Board.
Install the Pinterest Pin It Button
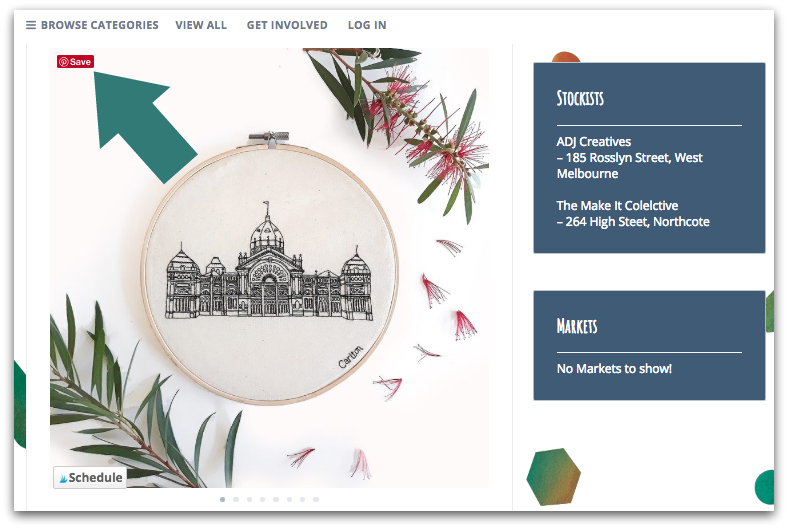
Not everyone who visits your website will have the Pinterest Browser Button. To make it easy for them to Pin your products and website images to their Pinterest account, install a Pin It Button on your website.
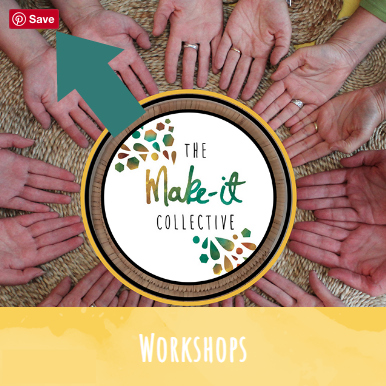
The Make It Collective uses the Pinterest Pin It Button On Image Hover plugin, which you can see in action by hovering over any of the images on The Make It Collective website.
If you’re using a desktop computer right now, hover over the image below to see this in action.
There are a variety of free WordPress Pinterest Plugins available to help grow your following from your website, including Follow Me Badges and Gallery Widgets. If you have a showcase page in The Make It Collective Directory, we’ve taken care of the Pin It Button for you, making it super easy for our website visitors to upload your product pics from your listing.
Pinning Blog Posts
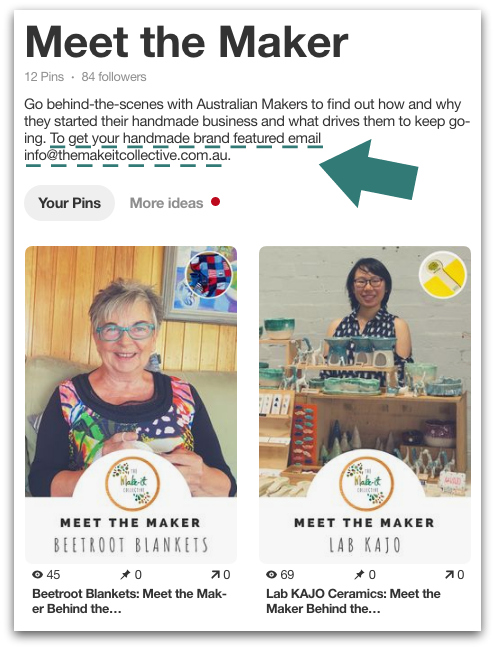
If you’re Pinning products faster than you can make them and run out of original images, start Pinning your blog posts to drive traffic back to your website. The Make It Collective does this with our Meet the Maker blog posts by creating a Pin using Canva‘s Pinterest graphic templates.
We include an image of the Maker, along with a preview image of their product, their business name and the name of the series, Meet the Maker. When these Pins are added to our Meet the Maker Pinterest Board, we include a link to the article on our blog. When the Pin is clicked on Pinterest, it drives traffic back to our blog and introduces readers to our Makers’ products.
We’ve done the same for our Makers Education blog posts: On the Blog Pinterest Board.

Designing the Ultimate Pin
To create Pins that entice people to click through and re-Pin, follow Pinterest’s creative best practices:
- Use vertical images around 1,000 x 1,500 pixels (Canva Pinterest templates are pre-sized for you)
- Make your product or brand the focal point of the image.
- Provide context by showing real people using your product, or images that bring your Pins to life.
- Subtly include your logo, but avoid the bottom right corner, as this can be covered up by product icons.
- Add text overlays to make your Pins stand out, add context and enhance your message, but keep it short so it’s easy to read for mobile users.
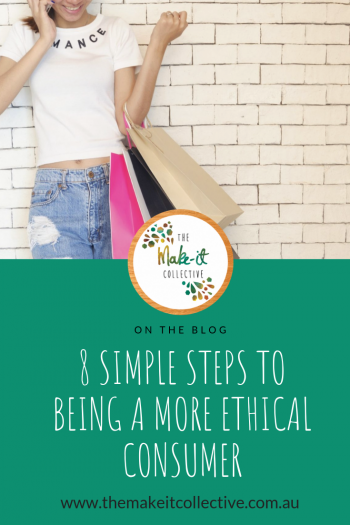
Here’s one we prepared earlier…
Pinterest for Handmade Businesses: The Next Step
Once you’ve got the Pinterest basics covered and you’re ready to level up, start experimenting with Pinterest Advertising and promote your Pins to reach a wider audience.
Show us your Pins!
Is your handmade business on Pinterest? Head over to The Make It Collective Community Group on Facebook and post your Pinterest URL in the discussion so we can check out your profile and give you a follow!
 Does this post need updating? We do our best to keep our content up to date, but if something has changed and this post needs updating, please get in touch and let us know.


