For some makers, pricing handmade products is the least favourite part of the job; a job that started off as a hobby… a craft experiment you stumbled across one rainy day on Pinterest that was refined over time until somebody eventually said, “Hey, have you ever thought about selling these?!”
Putting a price on – and ultimately parting with – something you’ve poured your heart and soul into for countless hours can be a daunting prospect, but there are some simple measures you can take to ensure your products are well-priced and you are charging what you’re worth.
But first, let’s look at why pricing is so important; to you, your customers and the handmade industry as a whole.
The Risks of Poor Pricing…
Under-pricing
As Mei from Creative Hive explains, when you under-price your products you’re actually doing more harm than good. You simply won’t make enough cashola to grow your business and continue working for yourself doing something you love, and you won’t have enough money for marketing your handmade business. But that’s not all under-pricing does…

Undercutting the Market
When too many makers in a particular niche under-price their products, buyers get a taste for cheap price tags. Then, when a new maker enters the market (or an existing one gains the confidence to charge a fair price for their work), they find themselves priced out of the market because customers have become too comfortable with the lower prices.
Even hobby makers need to be aware of the consequences of under-pricing. If you’re a weekend maker with a small customer base that you fear will desert you for charging a reasonable price, consider your fellow makers for a moment: those who’ve taken the brave leap into full-time making, trying to create a viable living through their handmade craft, but struggling to make ends meet because they’re having to compete with ‘mates rates’ and hobby prices.
The world of handmade is a sisterhood (brothers and others welcome, of course) so it’s everybody’s responsibility to ensure the market stays steady with fairly-priced products.
![]()
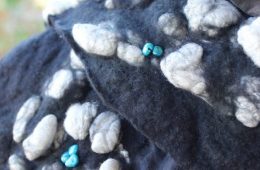
Perception of Quality – A Remarkable Case Study
Perception is paramount when it comes to pricing. If your products are considerably cheaper than your competitors, customers are likely to question the quality of your items and craftsmanship. The opposite is also true of inflated prices.
Take this case study from Robert Cialdini’s book, Influence: a local jeweller completely sold out of turquoise jewellery because she accidentally priced it at double the original price, instead of half. Since turquoise had proven unpopular in the past, she figured by drastically reducing (halving) the price, she’d move more stock.
But something unexpected happened when she did the opposite and accidentally doubled the price…
The premium price tag made the jewellery more appealing to buyers – those who had previously snubbed the colour at its original, ‘perceived’ low-value price.
Now, this is not to say you should rush out and double the price of your handmade products, but keep this case study in mind when pricing new items if you’re tempted to go low… You just never know.

Pricing Too High
Don’t get carried away with the jeweller and the turquoise story. While it’s an interesting case study in value perception, keep in mind that your customer demographic may be very different to that of the jeweller.
If you price your products too high, you risk fewer sales. While your profit margin will be bigger, you’re likely to sell less stock. The key is to test and measure your pricing until you find the sweet spot between steady sales and decent profits.
Now It’s Time For Some Research…
So, not too low, not too high… How do you find ‘just right’?
Research.
Take a look at handmade products online and see how other makers in your niche are pricing. But don’t be fooled – just because an item is priced at $200 doesn’t mean people are actually buying it for that price.
To get a real feel for how much stock a maker is moving, checkout their sold listings. This gives you an idea of the quantity and frequency of sales – something to consider when setting and testing your own prices.
Ashley Martineau from Craftsy suggests that if you’re new to the niche you’re working in, price just below the average price (compare around 5-10 similar products to establish the average cost), then once you’ve lured buyers in and impressed them with the quality of your product and stellar service, gradually increase your prices with repeat customers.
If there isn’t a lot of competition for your product and sales have been plodding along steadily, don’t become complacent – this is another good time to test a price rise. You won’t know what people are willing to pay until you test the waters.

Other Things to Consider When Pricing Handmade Products…
Seasonal Price Changes
If your product is subject to seasonal demand (Christmas cards or Valentine’s Day items), consider seasonal pricing.
Some business gurus suggest enticing customers with lower prices during the slow period, then increasing the price of seasonal products when demand is high, so the money made during peak sales compensates for the low demand and slow sales throughout the remainder of the year.
Felt Market points out however, that unless you sell products that deteriorate over time, like food, you can avoid taking a big loss from heavily discounting seasonal stock by pulling the items from your shop when the rush is over and saving them for next season, when demand (and prices) are higher.
![]()
Free Shipping
According to a US study, nine out of 10 survey participants said free shipping was the number one incentive when asked what would make them shop online more often. Another study found that shipping and handling costs triggered 52% of online shopping cart abandonment – there’s nothing like a surprise fee to crush your buying high!
So what does this mean for makers? Losing money on shipping just to make a sale will cut into your profits, however there are strategies to reduce the impact on your business – approximately 60% of online retailers cite ‘free shipping with conditions’ as their most successful marketing tool.
These conditions could include a range of tactics, like waiving shipping costs when customers exceed a price threshold, or bundling 2 or more products together to qualify for free shipping. Here are some other tried and tested free shipping strategies that might be worth exploring for your handmade business.

The Divine 9
Ever wondered why some products are priced at $99, rather than $100? Seems ridiculous right, when you could just round it up and save shuffling around in the change tin for coins?
Well, studies have shown that this pricing tactic, referred to as “charm prices”, does in fact work, and in some cases can increase sales by 24%.
One experiment further proved the power of 9 by selling a standard women’s clothing item at three different prices: $34, $39 and $44. Researchers were surprised to find the best-selling item was $39, totalling more sales than the cheaper priced option of $34!
So if you’re selling handmade products for neatly rounded prices, try testing the power of 9 with a couple of your items and see which ones come out on top.

Now, Let’s Get Down to Numbers…
If you’re still struggling with pricing handmade products after hours of competitor research, we’ve pulled together a collection of formulas from industry experts to help you nail down some starting figures.
***Remember, ‘supplies’ or ‘overheads’ can include costs like advertising, transport and stationery. Don’t go adding your total monthly studio rent and other expenses into every item you sell, but add up all monthly expenses and divide that number by the number of items you’d like to sell each month. This gives you a rough idea of the additional costs to be included in ‘supplies’.
Craftsy
Step 1) Cost of supplies + $10 per hour (total time spent making product) = Price A.
Step 2) Cost of supplies x 3 = Price B.
Step 3) Price A + Price B divided by 2 (to get the average between these two prices) = Price C.
Step 4) Compare Price C to your market research and adjust accordingly.
Creative Hive
Step 1) Cost of supplies + your time (hourly rate x hours spent making) = Item Cost
Step 2) Item Cost x Markup (between 2.0 – 2.5 or more) = Wholesale Price
Step 3) Wholesale Price x Markup = Retail Price
Felt Magnet
Cost of supplies + your time + overheads (i.e. studio space, office supplies) = Minimum Base Price
To figure out the retail price some people recommend multiplying the base price by 2.5 or 3
One of the most common formulas for wholesale pricing: Minimum Base Price x 2
Some artists choose to offer a wholesale pricing scale:
Orders of 25 sets or more will get the x 2 pricing per box.
Orders of 50 sets or more will get a x 1.75 pricing per box at $13.03 per box.
Orders of 100 sets or more will get a x 1.5 pricing per box at $11.18 per box.
Morgan Nield
Materials + Labour + Expenses + Profit = Wholesale x 2 = Retail
Learn how to really break this formula down and have a read of Morgan’s band-aid business story to avoid making the same mistakes!
Don’t Forget to Include Merchant & Payment Processing Fees
If you are selling through Etsy, it’s important to consider both Etsy and PayPal fees, which can be worked into the initial base formula:
Minimum Base Cost + Etsy fee + PayPal fee = Item Cost
The new retail price is x 2.5 this new Item Cost, which includes Etsy and Paypal fees.

BONUS TIP:
Avoid paying retail price for your supplies and aim to buy all your materials wholesale, or at a discounted price. The less you pay for materials, the greater your profit will be.
If you’re chasing a wholesale supplier for a particular product, get in touch and we’ll put a call out to our Makers Directory Members to see if we can point you in the right direction!

Over to You…
As with any business, there are many variables that make a handmade brand unique (products, suppliers, customers, competition and location, to name a few). With this in mind, test and measure your pricing and fees until you find the right balance that works for both you and your customers.
With each new price, allow at least 3 months of testing to gather enough data to compare prices and make a decision. If you sell on multiple platforms, you could even use them to directly split test your pricing between two or three sites simultaneously.
From the team at The Make It Collective, we wish you all the best with pricing your items! If you have any questions or comments about pricing handmade products, please get in touch – we’d love to hear about your own strategies and what is (or isn’t) working for your business!

 Go to store